Selection Tools


There are four tools used to select an area within the active layer. Three Shape selection tools and the Magic Wand selection tool.
Rectangle Select
Use this tool to define a rectangular or square region. For more information on how to use this tool, see the Rectangle Select Tool section.
Lasso Select
This tool allows you to draw a freeform selection region where the outer edge of the selection follows the cursor. The shape is closed automatically by a straight line linking the current cursor position with the start point. For more information on how to use this tool, see the Lasso Select Tool section.
Ellipse Select
This tool allows elliptical or circular selections to be made. For more information on how to use this tool, see the Ellipse Select Tool section.
Magic Wand
The Magic Wand is used to select areas of the active layer that have similar colors. For more information on how to use this tool, see the Magic Wand Tool section.
Making Selections
The basic use of these tools is straightforward: click and drag the mouse cursor to create a selection shape. Releasing the mouse button relinquishes editing mode and fixes the selection.
Once a selection has been created, editing operations (including effects and adjustments) are confined to the active selection. This can be used to limit drawing to a specific area of the layer.
To edit an area outside the current selection it is necessary to either add the new area to the selection or to deselect the active selection.
Warning
Editing operations are confined to the active selection. It is not possible to edit outside an active selection.
When a selection is active it will be surrounded by a dashed moving outline to indicate the area (known as the "dancing ants"). If one of the selection tools is active, a blue highlight will also be applied to the selected area to aid identification. This highlighting is removed when another tool is chosen to improve color accuracy.
Tip
You can create and move a selection at the same time.
While dragging out a selection using one of the Shape Selection tools, additionally hold down the
Manipulating Selections
Once a selection has been made, it can be moved, rotated and scaled using the ![]() Move Selection tool.
See Move Tools page for more information.
Move Selection tool.
See Move Tools page for more information.
Deselecting Selections
To stop using an active selection it needs to be deselected.
To deselect via the keyboard, press
To deselect using the mouse cursor, click the
Selection Modes
There are five selection modes which alter how successive selections interact. The modes are Replace, Add, Subtract, Intersect and Invert ("xor").
A mode can be chosen from the
Replace 
This is the default selection mode. Any new selection made will replace any and all previous selection(s).
Add (Union) 
A new selection is added to any previous selection(s). This allows multiple areas to be selected at once. Any other selection tool can be used to make additions.
The following selection was made by drawing a circle selection using the
Tip
To add to an existing selection, hold down the
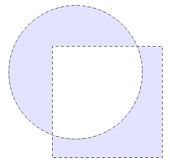
Subtract 
In this mode, any newly defined areas are removed from previously created selection(s). This mode allows a selection to be modified or reduced in ways not possible by making a single selection. Any other selection tool can be used to make subsequent removals.
For example, if a circular selection is made with the
Tip
To remove portions from an existing selection, hold down the
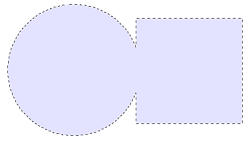
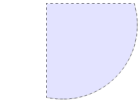
Intersect 
In the
This quarter-circle selection was created by creating a large circular selection then a smaller square selection with
Tip
Enable
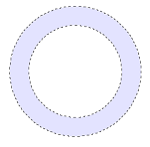
Invert ("xor") 
This acts like
This mode allows the creation of complex selections like this one, made using a combination of the
Tip
Enable
Selection Clipping Modes
There are two selection clipping modes associated with the
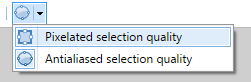
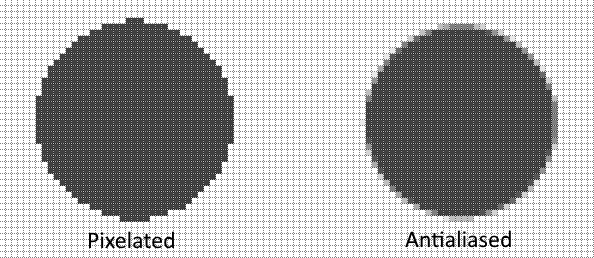
These settings dictate whether the selection edge is clipped to a per-pixel boundary, or if the edge is antialiased.
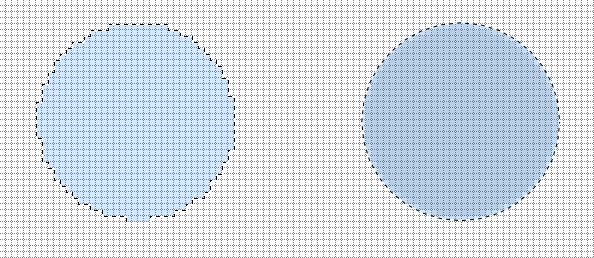
If each of the selections above were filled with a solid color, the coarseness of the edges can be clearly seen (below).
The filled shape on the left is pixelated. The fill color either fills an entire pixel or the pixel is unfilled.
The shape on the right is antialiased. The fill color is subtly extended into pixels which are partially covered by the selection. The result is a far smoother edge.