paint.net

documentation

Revision Date: 29 January 2023

Clone Stamp Tool Clone Stamp
L

This tool is used to copy regions of pixels from one location to another. The source and destination can be on the same layer or different layers within the same image.

To use the Clone Stamp, first set the source point where the pixels will be copied from.  Do this by clicking an area of the image while holding down the Ctrl key.

Note

Set the source point by holding down the Ctrl key and clicking on the source image.  Repeating Ctrl + Click sequence resets the source to the newly clicked location.

Navigate to the destination location (where you want the pixels to be copied to). The source location will remain where it was set.  Click and drag to copy from the source to the destination.  Note that the source point moves in the same path as the tool when cloning starts. This results in the tool path being copied as a stripe rather than just the source point.

The relationship between the source and destination is fixed once the actual cloning is started.  Once the relationship is set, the points remain locked together.

Clone source and destination are locked once cloning starts
Clone source and destination are locked together once cloning starts.

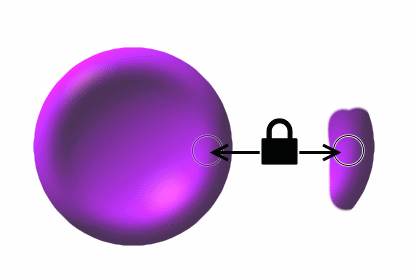
This relationship will persist through tool changes and other editing operations.  To break the link, set a new source point by holding down the Ctrl key and clicking at a different location.

Note

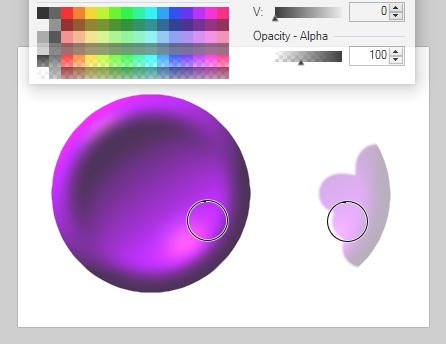
While cloning, circles are drawn to indicate the location of the source and destination.

Tool Bar Options

Clone Stamp Tool options

Brush size

The size of the area to be copied is set by the Brush size setting in the Tool Bar. The [ and ] keys can also be used to change the size, and adding the Ctrl key to the square bracket keys increases the rate of change.
Brush size accepts decimals in the Tool Bar value box, so a brush size of 10.25 is perfectly valid.

Pressure Sensitivity

Pressure Sensitivity This split-button toggle is used to enable/disable pressure sensitivity.  If Pressure Sensitivity is enabled, pressure on the hardware will be reflected in the size of the cloned region.
The button appears between
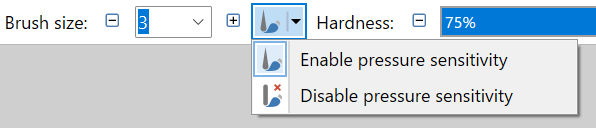
 Brush size and Hardness only when a compatible pen or drawing tablet is detected, and Windows Ink has not been disabled in Settings.

Pressure Sensitivity toggle

Hardness

The Hardness setting in the Tool Bar determines how hard or soft the edges of the cloned area will be.  Reducing the Hardness setting has the effect of softening the edge of the stamp, this will make cloned areas more diffuse (softer) and harder to detect.

Example - Clone Stamp & Hardness
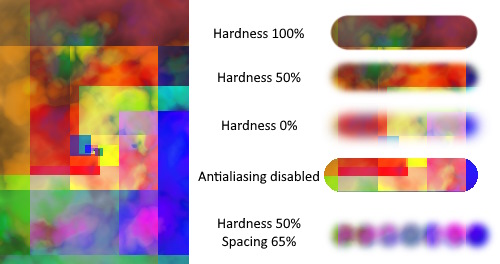

Example 1
Clone Stamp tool showing the effect of Hardness, Spacing & Antialiasing on areas cloned from the left image.

Note

Hardness can be considered the strength of the antialiasing used to soften edges.  Because of this link, the Hardness setting is ignored if Antialiasing is disabled.

Spacing

The Spacing setting in the Tool Bar determines the rate at which the tool path is sampled.  A low spacing will yield a continuous path, with little 'space' between inputs. A high spacing will allow more travel of the cursor between inputs to the point where the path may be returned as a series of individual inputs or dots.

Path Smoothing

The path of the Clone Stamp can be artificially smoothed to create more subtle changes in direction. This toggle turns path smoothing on and off.

Antialiasing

Cloned regions can be rendered with an aliased (jagged) or antialiased (smoothed) edge. This toggle selects which mode will be used.

If aliasing is selected, the Hardness setting will be ignored.

Blending mode

A Blend Mode may be applied to the cloned path, much like a layer blend only specific to the tool (see Blend Modes for more information).

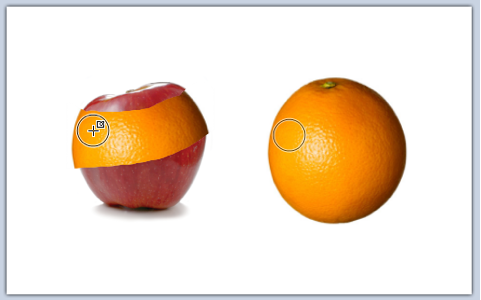
In the picture below, the orange has been cloned to appear as part of the apple.

Example - Clone Stamp Tool

Example 1
Cloning with horizontal mouse movements to copy stripes from the orange over the apple.

Selection Quality

This setting determines if the selection boundary should be aliased (pixelated) or antialiased (smoothed). If aliased/pixelated is used, selection boundaries will be snapped to the nearest pixel, resulting in a jagged or stepped appearance when the tool meets these edges. If antialiased/smoothed is used, the selection boundaries will be antialiased so a meeting between the tool and the boundary will be smoother.

Adjusting the Opacity of the Stamp

Clone Stamp inherits the opacity of the Primary color if the Left mouse button is used to perform the cloning action.  Using the Right mouse button makes the Clone Stamp inherit the opacity of the Secondary color.

If the opacity is lowered the stamp will copy a partially transparent copy of the source.  In the following image the opacity of the Primary color has been reduced to 100.  The result of cloning using this setting sees the copied pixels having reduced opacity compared to the source.

Reducing the opacity of the clone stamp
Cloning with lowered opacity.