paint.net

documentation

Revision Date: 28 January 2023

Eraser Tool Eraser Tool
E

This tool is used to remove parts of the active layer or selection. It can be useful when working with multi-layered images as portions of an upper layer erased will allow lower layers to show through.

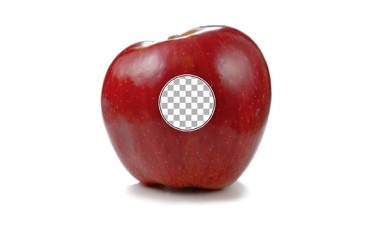
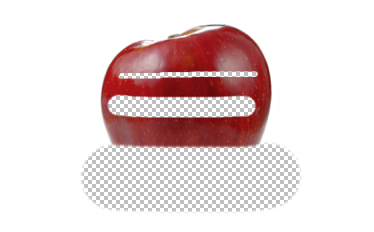
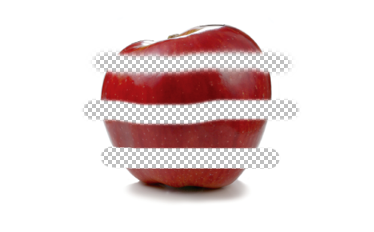
Example - Eraser Tool

Example 1
Original Image
Example 2
After using the Eraser Tool in the middle of the image. Note the gray and white checkerboard pattern (denoting transparency).

The Eraser works by marking areas of the layer as being transparent (i.e. having an Alpha value of zero) or partially transparent (Alpha < 255).  Areas completely erased will have the original RGB color information replaced with black (hexadecimal code #000000).  Areas undergoing partial erasure will retain the original color information and have a lower opacity value applied.

The eraser tip is circular in shape. This is not able to be altered.

Note

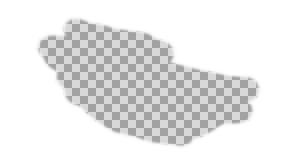
Erasing may result in a checkerboard pattern being shown. This pattern is used to denote areas of the image that are transparent. The pattern is not actually part of the image and will not be seen outside of paint.net's editing environment.
checkerboard
To change the brightness of the checkerboard pattern, open the Settings Dialog and adjust the slider in the User Interface tab.

Eraser Tool options

Eraser Tool options
Eraser Tool options

Brush size

The size of the eraser tip is set by the Brush size setting in the Tool Bar. The [ and ] keys can also be used to change the size, and adding the Ctrl key to the square bracket keys increases the rate of change.
Brush size accepts decimals in the Tool Bar value box, so a brush size of 10.25 is perfectly valid.

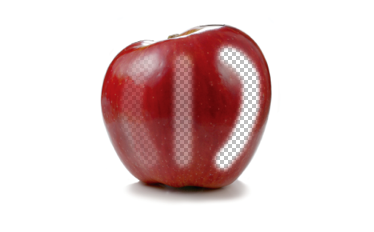
Example - Brush size

Example 1

Eraser Tool showing three brush widths.
At the top the Brush size is set to five pixels wide.  In the middle the Brush size is 20 pixels.  At the bottom the Brush size is 65 pixels.

Pressure Sensitivity

Pressure Sensitivity This split-button toggle is used to enable/disable pressure sensitivity.  If Pressure Sensitivity is enabled, pressure on the hardware will be reflected in the size of the eraser tip.
The button appears between
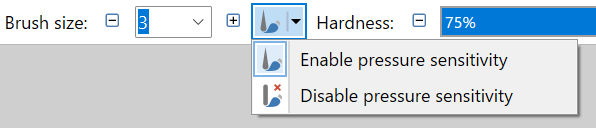
 Brush size and Hardness only when a compatible pen or drawing tablet is detected, and Windows Ink has not been disabled in Settings.

Pressure Sensitivity toggle

Hardness

The Hardness setting in the Tool Bar determines how hard or soft the edges of the erased area will be.  A high setting gives a sharper edge, while a low setting gives a more diffuse or softer edge.

Example - Hardness

Example 1

Eraser Tool showing three hardness settings.
At the top the Hardness is set to 10%. Note the soft edge.
In the middle the Hardness is to 50%.
At the bottom the Hardness is 100%.

Note

Hardness can be considered the strength of the antialiasing used to soften edges.  Because of this link, the Hardness setting is ignored if Antialiasing is disabled.

Spacing

The Spacing setting in the Tool Bar determines the rate at which the tool path is sampled.  A low spacing will yield a continuous path, with little 'space' between inputs. A high spacing will allow more travel of the cursor between inputs to the point where the path may be returned as a series of individual inputs or dots.

Path Smoothing

The path of the Eraser can be artificially smoothed to create more subtle changes in direction. This toggle turns path smoothing on and off.

Antialiasing

The Eraser can be rendered with an aliased (jagged) or antialiased (smoothed) edge. This toggle selects which mode will be used.

If aliasing is selected, the Hardness setting will be ignored.

Selection Quality

This setting determines if the selection boundary should be aliased (pixelated) or antialiased (smoothed). If aliased/pixelated is used, selection boundaries will be snapped to the nearest pixel, resulting in a jagged or stepped appearance when the tool meets these edges. If antialiased/smoothed is used, the selection boundaries will be antialiased so a meeting between the tool and the boundary will be smoother.

Softening the Eraser

The Eraser inherits the Alpha value of the Primary color if the Left Mouse button is used.  It inherits the Alpha value of the Secondary color if the Right Mouse button is used.  Lowering the Alpha value of the associated color slot makes the eraser softer and less aggressive.

Example - Alpha Setting

Example 1

Eraser Tool showing three Alpha settings.
On the left, the Alpha Setting is set to 60. The opacity of the erased area will be 255-60=195 and the original color information will be retained.
In the middle the Alpha Setting is set to 120. The opacity of the erased area will be 255-120=135. Again, the original color information will be retained.
On the right, the Alpha Setting is set to 255 (maximum). The opacity of the erased area will be 255-255=0. The original color information will be replaced with black (#000000)

Tip

The Eraser tool in Microsoft Paint works by painting with white. If this behavior is desired, use the Paintbrush tool and select white as Primary color in the Colors Window.