Shapes Tool 
O twice or Shift + O
The tool for creating geometric shapes in Paint.NET is the
The
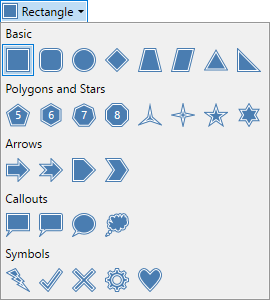
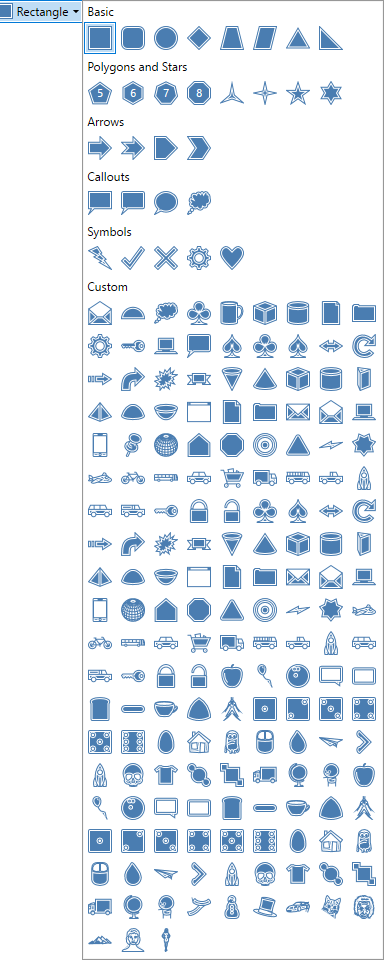
The different Shapes are selectable from the drop-down menu in the
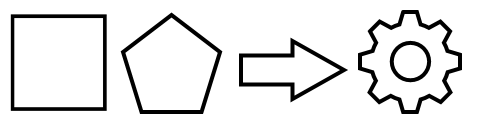
Basic Shapes
- Rectangle & Rounded Rectangle
- Ellipse
- Diamond
- Trapezoid & Parallelogram
- Triangle & Right Angle Triangle
Polygons & Stars
- Pentagon (5), Hexagon (6), Heptagon (7) & Octagon (8)
- Three-point Star, Four-point Star, Five-point Star & Six-point Star
Arrows
- Arrow & Notched Arrow
- Pentagon Arrow & Chevron Arrow
Callouts
- Rectangular Callout & Rounded Rectangle Callout
- Ellipse Callout
- Cloud Callout
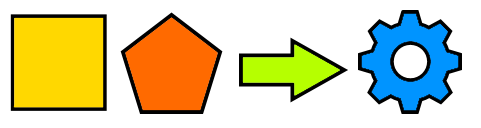
Symbols
- Lightning Bolt
- Check Mark
- Multiply
- Gear
- Heart
Tip
Pressing
To create a shape, click on the shape type in the
Control Nubs
The draggable control nubs transform the Shape by moving the corners of the Shape's bounding box. Click and drag the nubs to relocate them.
When resizing using the control nubs, the anchor point will be the nub opposite the one being dragged.
Dragging one nub over the one diametrically opposite has the effect of flipping the shape.
Shift Modifier Key
When creating a Shape, hold down the
The anchor point for resizing with the
Alt Modifier Key
Hold down the
Shift & Alt Modifier Keys
Hold down both the
Moving a Shape
Before a Shape is committed to the canvas, it can be moved anywhere on the canvas. Click and drag the pulsing four-arrows-in-a-square icon (see diagram below) using the
A Shape can also be moved by positioning the pointer inside the Shape. It will turn into a four-way arrow. Click and drag with the
The keyboard arrow keys
Rotating a Shape
Before a Shape is committed to the canvas, it can be rotated.
The Rotation Point determines the center of rotation. It looks like a circle with a cross inside it (see diagram below) and is initially located in the center of the Shape. Click and drag the Rotation Point to relocate it (it can be moved outside the Shape or even off-canvas).
Rotate the Shape about the Rotation Point using the
If the
The keyboard arrow keys
Committing a Shape to the canvas
Commit the Shape to the active layer and exit editing mode using any one of these methods…
- Press the
Enter key - Click outside of the bounding box of the current Shape.
- Click Finish in the
Tool Bar - Draw a new Shape.
Tool Bar Settings

Shape Selector
Activate a Shape by clicking on it in the selection dropdown.
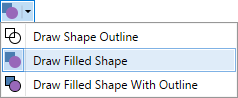
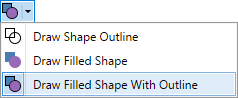
Draw Mode
Shapes are able to be drawn in three distinct modes;
Example - Shape Styles


Brush Size
The keyboard keys
Note
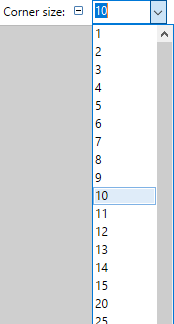
Corner Size (Rounded Rectangle only)
The Rounded Rectangle Shape has an additional configurable Tool Bar setting:

Tip
Once the
Note that the change applied with each key press is selected from a scale.
Changes of 1, 5, 25, 50 or 100 might be applied depending on the magnitude of the current
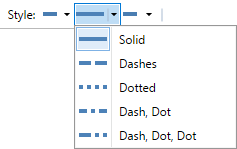
Line Styles
The edges of the shape can have different styles applied while drawing. The style can be either solid or a combination of dashes and dots.
Fill Styles
Shapes can be rendered using a
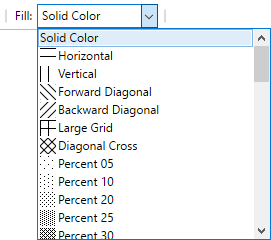
Fills utilizing a fill style will make use of both the
Antialiasing
There are two antialiasing modes associated with the
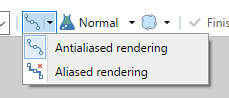
These settings determine whether the lines used to create the Shape are rendered in a clip-to-pixel mode or not.
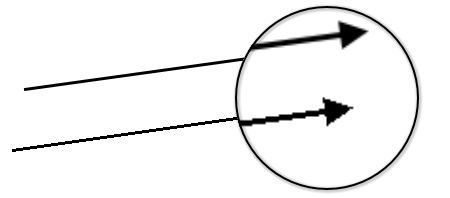
When
When
Antialiasing can be switched on or off via the
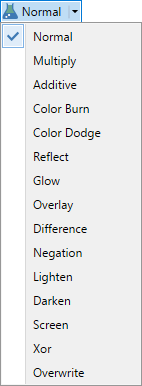
Blend Modes 
Shapes can be applied using a
Selection Quality
This setting determines if the selection boundary should be aliased (pixelated) or antialiased (smoothed). If aliased/pixelated is used, selection boundaries will be snapped to the nearest pixel, resulting in a jagged or stepped appearance when shapes meet these edges. If antialiased/smoothed is used, the selection boundaries will be antialiased so a meeting between the shape and the boundary will be smoother.
Custom Shapes
Paint.NET's built-in Shapes cannot be deleted or modified, however you can add new Shapes or create your own.
Shapes are rendered from customized XAML files. One file is required for each Shape.
XAML Shape files must be copied into the Paint.NET/Shapes/ folder and Paint.NET restarted before new Shapes will show up in the drop-down list.
The best place to find free pre-made custom Shapes is the Paint.NET forum: Paint.NET Shapes forum
To install custom shapes, see this guide by forum Administrator BoltBait: How To Install Custom Shapes
Note
In the Windows Store version of Paint.NET, the directories for plugins and Shapes are different. These will have to be created manually.
First create a folder in /My Documents/ called /Paint.NET App Files/.
Then create three subfolders inside the new folder. These should be called:
- /Effects/
- /FileTypes/
- /Shapes/
If you wish to create your own Shapes, you may find this tutorial useful:
How To Create Custom Shapes
Additionally, there is a plugin which will assist making your own custom Shapes: