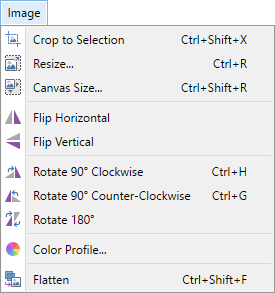
Image Menu
This menu contains commands that affect all layers in the current image.
This contrasts with the
 Crop to Selection
This menu item is only available if a selection is active. Clicking this menu item will cause the current image to be cropped and replaced by the area that was selected.
If the selection is not rectangular or square, the bounding rectangle minimally surrounding the selection will be used. Pixels outside the selection will be made transparent with the color information removed.
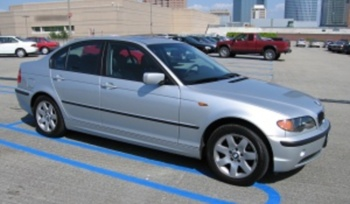
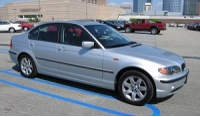
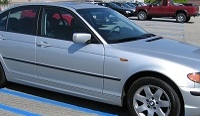
Example - Crop to Selection
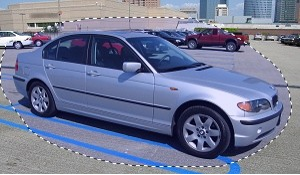
Here a selection has been made around the car using the
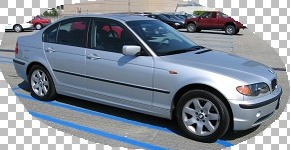
Following
Note
The checkerboard pattern is used to indicate areas of the image that are transparent. This pattern not a part of the image and will not be seen outside of Paint.NET's editing environment.
 Resize
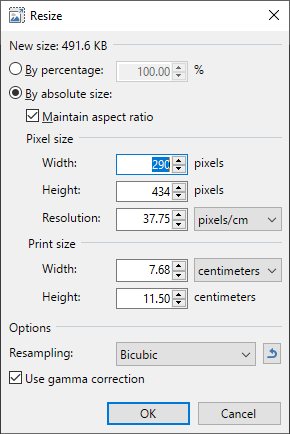
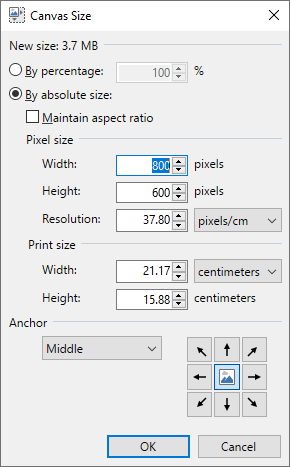
This command changes the size of the image. The image can be either enlarged or reduced to the size specified. Clicking the menu item opens the following dialog.
Tip
The
Note
The
When the image is saved, a compression algorithm will reduce the image to a much smaller file size.
Two resize modes are By percentage and By absolute size. These offer the option of changing the size by a percentage or specifying a new Height and/or Width.
If the "Maintain aspect ratio" option is checked, typing a new Width value will maintain a proportional Height value, and vice versa.
The print size is calculated based on the resolution (DPI).
Pixel Size / DPI = Print Size
This formula can be rewritten Print Size x DPI = Pixel Size
For example, if an image is specified to be printed at two inches wide, and the resolution is set to 96 pixels/inch, then the image will be resized to a width of 96 x 2 or 192 pixels. This is how many pixels will be required to make the image two inches wide when printed at a density of 96 dots-per-inch.
"Resampling" is the process of computing how new pixels appear based on the existing pixels. There are eight types of resampling that can be chosen. Some algorithms produce better looking results, but take longer to complete.
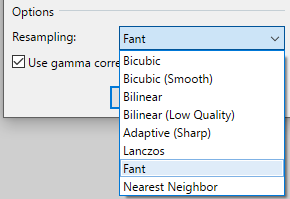
- Bicubic The default resampler. This uses high-quality bicubic scaling that balances the smoothness and sharpness of the image. Also known as Catmull-Rom or "Catrom". In the family of cubic filters, it uses (b=0, c=0,5).
- Bicubic (Smooth): This uses a bicubic kernel with no sharpening or aliasing. In the family of cubic filters, it uses (b=1, c=0).
- Bilinear This uses linear (aka triangle/tent) interpolation. It produces much higher quality results than Bilinear (Low Quality) when reducing the size of the image, but the same results when enlarging.
- Bilinear (Low Quality) A bilinear interpolation algorithm. The output pixel values are computed as a weighted average of the nearest four pixels in a 2x2 grid. This is the algorithm often used in real-time computer graphics for bilinear filtering.
- Adaptive (Sharp) This mode chooses an appropriate high-quality resampler based on the ratio between the source and target sizes. This is a good choice for photos.
- Lanczos A popular filter for upscaling. Uses the Lanczos reconstruction kernel with three lobes (positive central and -1 alternating negative and positive lobes on each side).
- Fant When reducing the size of the image, this uses a simple weighted average of all the pixels of the image. When enlarging an image, this is equivalent to Bilinear.
- Nearest Neighbor The closest pixel is chosen then creating the new image. This produces an aliased, pixelated, or "blocky" result.
If you're unsure about which resampling mode to use, go for the default Bicubic.
The Gamma Correction checkbox determines if the resize operation will maintain the luminosity of the image. This affects whether the resampling calculations are performed using linear gamma.
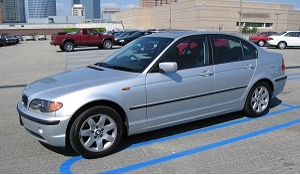
Example - Resizing an Image
Depending on the type of image that is being resized, using the
 Canvas Size
This command enlarges or shrinks the canvas without affecting the size of the image on it.
When enlarging the

If the canvas size is reduced, the edges of the existing image outside of the new area will be cropped.
Example - Resizing the Canvas

 Flip Horizontal
 Flip Vertical
These menu items allow the image to be flipped horizontally or vertically. Remember - ALL layers will undergo this transformation.
Example - Flipping an Image
 Rotate 90 ° Clockwise
 Rotate 90 ° Counter-Clockwise
 Rotate 180 °
The next three menu items rotate the image by 90° (in either clockwise or counter-clockwise directions) or by 180 degrees.
Example - Rotation
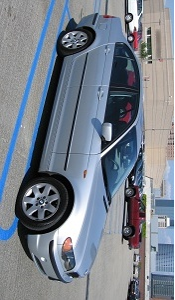
Tip
To rotate an image by angles other than 90° or 180° see the Move Tool section.
 Color Profile
Clicking this menu item opens a dialog which allows the application of embedded or external color
profiles. This feature is especially useful to convert images to their 'true' color profile.
Built-in color profiles include sRGB, Adobe RGB, Display P3 and Pro Photo RGB. Users may also apply any
color profile associated with their system display or import and apply any *.icc/*.icm file. Note: All
layers will be converted if a color profile is imported.
The dialog also allows color profiles to be exported.
Example - Apply Embedded Color Profile
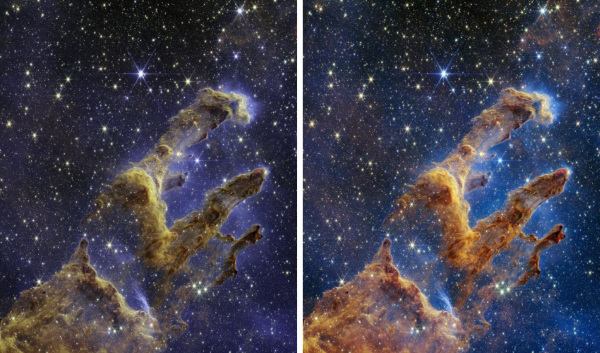
image of the "Pillars of Creation" produced by NASA and the Space Telescope Science Institute (STScI)
 Flatten
This action takes an image with multiple layers and combines them into a single layer.
The action becomes available only when an image has more than one layer.