Tool Bar
The

Common Actions

These buttons allow quick access to many common actions.
From left to right, they are New Image, Open (existing image), Save, Print, Cut, Copy, Paste, Crop, Deselect, Undo, and Redo.
These actions can also be found in the
View Controls
The next two buttons toggle the visibility of the
 Pixel Grid
The
The same icon can be used to toggle the grid off again. There is a corresponding menu command to enable or disable the grid in the
Note
The Pixel Grid is not visible below 200% magnification.
 Rulers
This icon shows or hides rulers along the top and left edges of the image canvas.
The
When a selection is active, its bounding rectangle will be highlighted in the rulers, making it easier to measure. The cursor position is also shown in the rulers making it easier to accurately apply other tools.
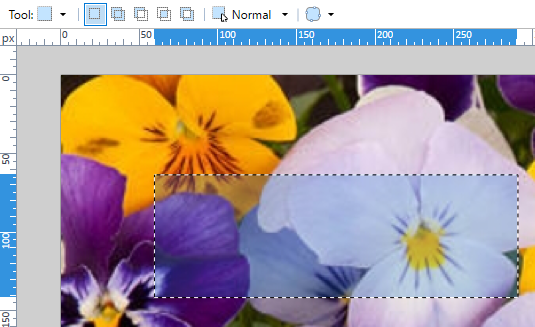
There is a corresponding menu command in the
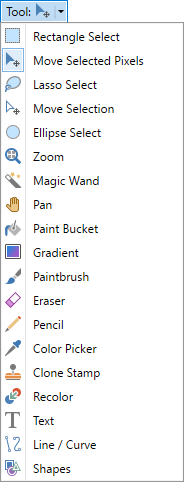
Tool Choice
The second row of the
This control is provided to augment the
Tool Configuration
After the
Note
Some tool options in the
The Brush Width has additional icons to increment and decrement the value and keyboard shortcuts are also assigned; [ and ].
Shapes, Brush, Style, and Fill

The first two options shown are specific to the new Shapes Tool. These are covered in the Shapes Tool section.
Several tools use Brush Width, Style and Fill options. Here the width of the brush and line style can be selected. If a fill is also selected, both the
Selection Tools

The "Selection Mode" section of the
When a selection is created with one of the Selection tools any existing selection will be replaced if the Replace mode is used. If Add mode is used, new selections will be added to the original region. Subtract removes new selections from the original region. The Intersect mode keeps those areas common to multiple selections while the Invert mode excludes common areas from multiple selections.
To find out more about these selection modes, visit this page Selection Modes.
The next option in this section of the is
Text

This section of the
Gradient

The
Magic Wand, Paint Bucket, and Recolor

The
The
Color Picker

The
There is a setting to automatically switch to another tool following use of the
Move Selected Pixels
The
Rasterization, Blend Modes & Selection Clipping
Many tools are affected by these options.
To use these split-buttons, either click on the icon to toggle its state or click on the down arrow to open a submenu where the options can be selected.
Rasterization
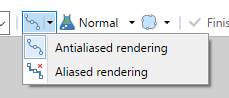
Rasterization affects how drawing is performed on a per-pixel basis with regard to the edge of the tool. In other words, it determines if the drawing will have antialiasing enabled or disabled. If enabled, the edges of the tool path will be smoothed. If disabled, the edges of the path of the tool will be snapped to the nearest pixel. A jagged or stepped appearance will result.
Example - Antialiasing
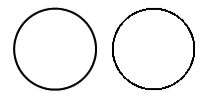
The circle on the left was drawn with antialiasing enabled. The one on the right was drawn with antialiasing disabled. The right circle is noticeably more "jagged" in its appearance:
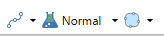
Tool Blend Modes 
The next control (also a split-button) controls the type of blending the tool will use.
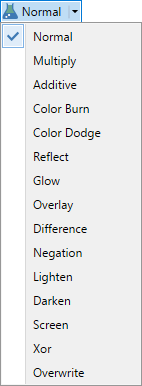
When in use, a
For more information on the Blend Modes, see the Blend Modes section.
Selection Clipping Mode
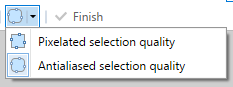
New to Paint.NET is the Selection Clipping Mode split button. This determines if the active selection should be aliased (pixelated) or antialiased (smoothed). If
Finish button

Many tools and editing options remain "active" until the
Tip
The keyboard shortcut for the