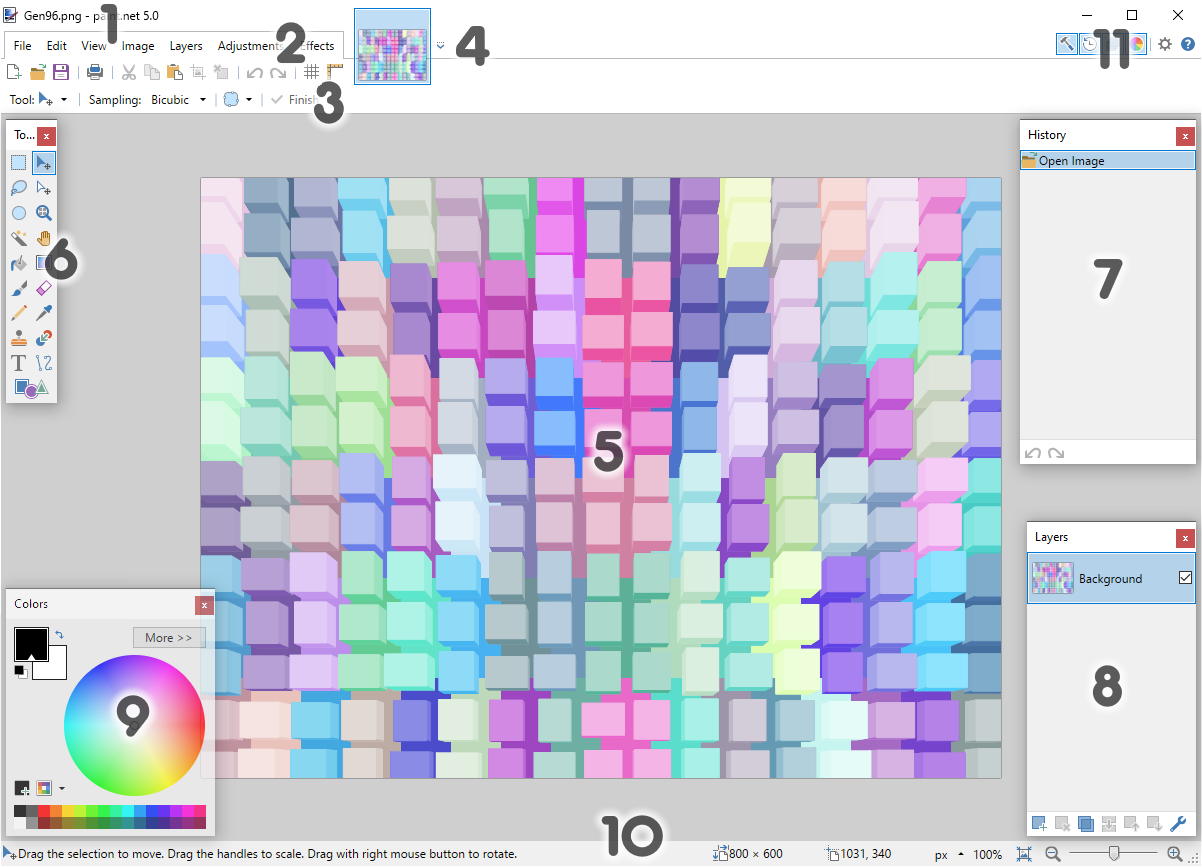
Main Window
The Paint.NET user interface (UI) in the following screenshot has been divided into eleven areas:
-
Title Bar
This shows the name of the image open on the canvas (or "untitled" if unnamed) and the Paint.NET version number.
If the current file has unsaved changes, the file name will be preceded by an asterisk.
Filename - preceding asterisk indicates unsaved changes -
Menu Bar
This area houses seven menus on the left and six utility icons on the right.
-
Tool Bar
Immediately below the
Menu Bar is theTool Bar . This houses several buttons and controls for executing common commands and accessing various Paint.NET features. On the second rank, adjustable parameters for the active tool are shown. -
Image List
Each image that is open shows a thumbnail in the image list. These work much like the tabs in a web browser.
Click on an image to switch to it. The thumbnail will become highlighted in the
Image List and the associated image loaded onto the canvas.Tip
In Paint.NET the images in the
Image List can be reordered using drag-and-drop. Click, hold and drag the thumbnail to a new position in theImage List to relocate it.If an image unsaved changes, the thumbnail will have an asterisk placed in the top left corner.
-
Canvas
This is where the image is shown and edited. All drawing, selecting and other editing actions occur here.
Note
The canvas and the surrounding grey area in the screenshot above are collectively called the Editing Window in these documents.
The Editing Window can be partially filled (as seen above), completely filled (maximized) or the canvas may be zoomed in beyond the visible limits of the Editing Window.
Note
The size of the default/initial image ("Untitled") is 800x600 pixels scaled by the system DPI setting. E.g. at 150% DPI scaling the image will be 1200×900.
-
Tools Window

This window is where the Paint.NET tools are activated or chosen. The active tool is highlighted in the
Tools Window.Hovering the pointer over a tool icon will display a tool tip for that tool.
-
History Window

Every editing action performed on an image within the current session is listed in this window. Closing Paint.NET or closing the image removes the entire editing history, clearing it entirely.
It is possible to step forward and backward in the image editing History by using
Undo ,Redo or clicking on an entry in theHistory Window. Toggle between one entry and the previous one by clicking repeatedly on the same entry in theHistory Window. -
Layers Window

Every image contains at least one layer. The
Layers Window is the primary area for adding, removing, accessing and managing layers. Layer Properties can be accessed by double-clicking on a layer.Tip
New to Paint.NET is the ability to reorder layers in the
Layers Window using drag-and-drop. Click, hold and drag the layer to a new position in theLayers Window to relocate it. -
Colors Window

This is the primary area for selecting and managing colors. It contains several controls for adjusting colors and opacity.
-
Status Bar
This area is divided into several sections. On the left, it displays quick help and status information. In the center, it displays rendering progress (if required). On the right information on the image size, cursor location and units of measurement are displayed beside controls for the view size.
-
Utility Windows
, Settings
 &
Help
&
Help 
The first four icons provide a quick method of resetting the position of the Utility Windows and toggling their visibility.
Tools Window
History Window
Layers Window
Colors Window
The next icon opensSettings Dialog
and finally is the Help icon which opens theHelp Menu
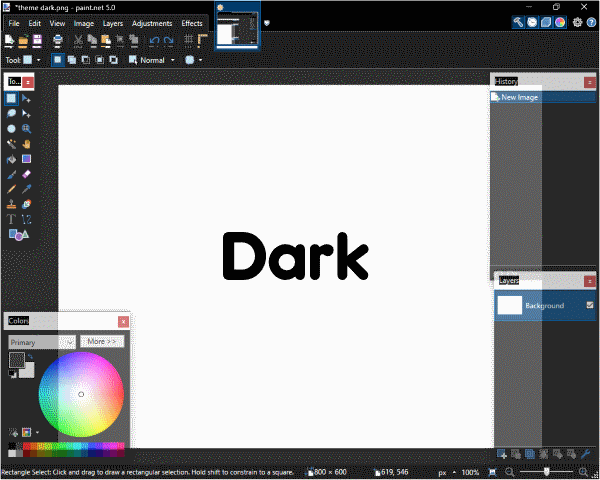
Color Schemes
Paint.NET offers several color schemes. These are selected from the
![]() + User Interface tab).
+ User Interface tab).